Order Detail Screen

Module: Order Detail Screen
Topic: Page Overview
Version(s): Version 5.1 and up
Editions: Standard, Commerce, Call Center
What is the Order Detail Screen?
The order detail screen displays data for a single customer order. The screen begins with six informational tiles that provide a snapshot of the order details. Below the tiles, there are five sections of order details: Customer Information, Shipping Information, Campaign Information, Payment Information, and Order Items. You will find several reports and customer service functions within all of these sections.
Page Tools
Built into the top toolbar of the Order Detail Page are quick navigation icons.
- The Back button will return you to the previous page.
- The next icon will bring you to the Customer Detail Center for this customer.
- The printer button opens a printer friendly version of the page, should you need to print a paper copy.
- Minimize will collapse the page to keep information hidden if needed.
Tiles
The six tiles lining the top of the order detail screen are intended to provide you with an at-a-glance look at some basic order details. These tiles will update as changes are made to the order, keeping the information displayed at the top of the page current.
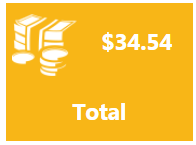
The first tile will display the total for the order, which will be the same as what is displayed in the Order Total field at the bottom of the page.
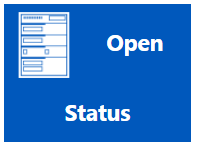
The second tile is for order status, which will be New, Open, Locked, or Closed. The status of the Items on the order determines the status of the order.
- New represents an order where all items are at Not Yet Available status. This is an order that has not yet been Pre-Payment Processed.
- Open will display when any items on the order are at a status that is not final.
- Locked will prevent updates to Customer, Shipping, and Billing Addresses as well as payment information for most agents.
- Locked will also prevent the use of the action buttons on the order.
- Payment & Address profiles are editable on the CS screen, however locked orders will be hidden from the secondary popup that offers to apply changes to existing orders.
- Closed will display when all items are at a final status.
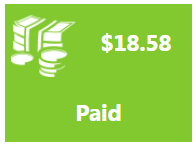
The next tile will provide you with the total value that has been paid already.
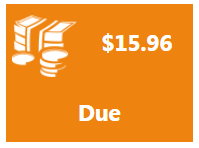
The due tile will indicate the amount that has not yet been paid. This will be the same as the Balance Due field at the bottom of the page.
This tile displays the date that the order was taken.
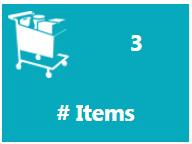
The last tile provides a count of order items for this order.
Customer Information
The customer information on an order is obtained from the Bill-To address and is utilized for lookup and reporting.
You can edit the customer address or add notes for the customer by clicking the edit pencil beside Customer Information.
*Client Name is based off the client associated to Source used to place order
Shipping Information
The shipping information on an order is displayed in this section of the Order Detail Page. This is where the address that the product(s) will be shipped to and the shipping method can be viewed.
To edit the Shipping Address, click the edit pencil beside Shipping Information to open the Customer Shipping Information pop up window. The Shipping address can not be edited when the Order Status is Closed.
To change the shipping method click the pencil icon next to Shipping Method. *This will only display prior to items exporting the system.
If there are any shipment transactions for the items on this order, clicking Print Packing Slip will open the Packing Slip Report.
Campaign Information
Information about the order’s source is available on the Campaign Information section of the Order Detail Screen.
Included in this section is:
- the name of the Campaign, as tied to the Source of the order.
- Below is the DNIS used to enter the order and the name of the Source.
- The Order Number is the OrderLogix order ID.
- The External Order Number and Web Order Number represent order IDs for this same order from other vendors.
- The Voice Print ID will include a hyperlink to a call recording, if available.
- Employee is the employee number and first and last name of the employee who entered the sale.
- The Packing Slip and Order Comments fields provide a place for an agent to place specific notes on the order.
- To the right you will find a list of dates.
- The Order Date is the date that the order was taken.
- The System Entry Date is the date that the order was entered or imported to OrderLogix.
- The Original Order Date is applicable for Continuity generated orders, as this will display the date of the initial order.
- Location and Promo Codes are displayed after this followed by Custom fields 1-5.
Click the edit pencil beside Campaign Information to edit the order's Campaign Information. Click Order Summary to view the Order Summary Report for this order.
Payment Information
Information about the order's Payment Method and Billing Address is found in the Payment Information section.
Click the edit pencil beside Payment Information to edit the payment method and billing address.
Click Print Receipt to view the Receipt Report.
Order Items
The order items section of the page lists the items that were ordered and displays a breakdown of the Order Total. There is also a bar of CS Actions, allowing order items to be added, modified, or processed as needed.
Action Buttons
 You can use Reports > Customer Service Reports > Customer Service Activity filtering for Reason Code to report on the action button usage
The Order Items actions bar contains buttons for Customer Service functionality.
- To add another item to the current order, click the
 New button.
 - To cancel an item on the order, click the
 Cancel button.
 - Note: An item can only be cancelled if it has not been processed.
- To reship an item, click the
 Reship button.
 - Note: Reship is only for items that have already shipped.
- To resubmit an item, click the
 Resubmit button.
 - Note: Resubmit is to be used for declined or invalid items.
- To refund an item in the order, click the
 Refund button.
 - Note: You can either open an RMA to grant a credit when the item has been returned, or you can open an RMA to exchange the product for another to be sent when the item has been returned, or you can grant an instant credit through the refund button.
- To mark an item as paid, click the
 Paid button.
 - Note: This works for awaiting authorization items only.
- To mark an item as shipped, click the
 Shipped button.
 - Note: This works for paid items only.
- To rush an item, click the
 Rush button.
 - To hold or release an item from hold, click the
 Hold button.
 - Note: Items can only be put on hold if they have not been processed.
- To choose items for payment processing, click the
 Process button.
 - To mark items as bad debt, click the
 Bad Debt button.
 - Note: Items can only be put to Bad Debt when they are fatal authorization. This button will not display when no items are eligible.
- To skip a payment, release an amount for immediate payment, or schedule payments for an installment, click the
 Schedule button.
 - Note: This button will only display if an installment item is added to the order.
Line Items
Each line represents a separate Order Item and will display corresponding details for each item.
- # - this is the sequential numerical value of the record line.
- numbers in red denote an action line item.
- Link - This is visual reference to help determine quickly the relationship between action items and their respective line item:
- Reships, - orange line
- RMA's - red line
- Hovering over the link will provide additional information for RMA's and Exchanges.
- Exchanges - blue line
- Hovering over the link will provide additional information for RMA's and Exchanges.
- Credits - red line
- Pencil icon allows you to edit the Order Item.
- Item SKU is the Product Offer Name
- Item Description is the description of the Offer.
- QTY displays the quantity of that item that was ordered.
- Price is the Unit Price multiplied by quantity ordered.
- Discount will display if there is a discount applied to the item.
- If the discount was applied because a coupon was used you will see the
 icon,
icon, - Hover over the icon to see the coupon code that was used:

- S&H is the shipping charge.
- Tax is the tax charge for that item.
- Please remember tax is determined based of the shipping address.
- Pay Date displays the date of the successful payment transaction for the item, if any.
- Ship Date displays the date that the product was shipped.
- Rush box will be checked if the item is to be rushed.
- Item Status - see below for more information
Item Status
The Item Status display’s the item’s current status. Hovering over the item status will display an item status log with a list of dates and statuses. An item with more than 10 previous item statuses in the Item status log will become abbreviated. Click on the Item Status to open the item’s Transaction Details in a pop out window. A list of item statuses and what they mean is available here.
Inventory
If the item has inventory components, you will see the  icon beside the Item Status. Hover your mouse over this icon to view the status of the inventory components or click on it to view Lot and Serial Number information for the inventory components in a pop out window.
 icon beside the Item Status. Hover your mouse over this icon to view the status of the inventory components or click on it to view Lot and Serial Number information for the inventory components in a pop out window.
- QOH= Quantity on Hand
- COM= Committed
- BO= Back Order
- OO = On Order
- DNO = Do Not Order
- DNS= Do Not Sale
- Expected Date= When units are expected to be in stock
- The expected date only populates if the following conditions are met:
- the inventory status is back ordered
- the item status is not awaiting ship confirm or item shipment delivered.
- the inventory items quantity on hand is 0
- and expected or due date is actually the purchase order due dateotherwise will be null (blank)
Pre-Authorization
If there is a Pre-Authorization available for the item, the  icon will display beside the Item Status.
 icon will display beside the Item Status.
Sku Substitution
If inventory item has been substituted, the  icon will display beside the Item Status. Hovering over the icon will display a popup telling you which inventory item was originally assigned, and which inventory item is being shipping instead, as well as which rule was evoked to trigger the substitution.
Total
This section provides the sum of the values from the line items.
- Total - sum of all line-item Price value
- Discount - sum of all line-item discount value
- Subtotal - The sum of all products on the order using formula quantity * (unit price – discount).
- Shipping - sum of all line-item S&H value
- Tax - sum of all line-item tax value
- Order Total - the total value being collected from customer
- Balance Due - this is how much of the order total has NOT been captured yet
Related Articles
Order Detail
Module: Customer Portal Paths: Welcome > View Detail Welcome > Order Number Link Orders > View Detail Orders > Order Number Link Topic: Order Detail OLX Version(s): 5.1 OLX Editions: Commerce, Call Center The Order Detail Screen will match ...5.1.307 - Delete Order From Customer Detail Screen
Version: 5.1 Patch: 307 Title: Delete Order From Customer Detail Screen Application Category: Other, Functionality Patch Type: Feature Description: Restored/migrated Order Delete functionality for Customer Detail screen (Order History Grid) ...5.1.235 - Add Change Ship Method Button and History to Order Detail Screen
Version: 5.1 Patch: 235 Title: Add Change Ship Method Button and History to Order Detail Screen Application Category: Other; CS Functionality (1) Patch Type: Feature Description: Activated change ship method for order button (and change history) on ...5.1.170 - Fixed Blank Item Status on Order Detail Screen Issue
Version: 5.1 Patch: 170 Title: Fixed Blank Item Status on Order Detail Screen Issue Application Category: Other; CS Functionality (1) Patch Type: Bug Description: Fixed issue with missing Item Status text on the order detail screen. This was caused ...5.1.7 - New Order Detail Center
Version: 5.1 Patch: 007 Title: New Order Detail Center Application Category: Other Patch Type: Feature Description: The Order Detail has been optimized and improved - Popups load faster without full page re-loads - Some of the buttons above the Order ...