Refund Item
 Module: Order Detail Page
Topic: Refund Item
Version(s): Version 5.1 and up
Editions: Standard, Commerce, Call Center

You can use Reports > Customer Service Reports > Customer Service Activity filtering for Activity = sys:Actions Refund or sys:Instant Credit or sys:Open RMA or sys:Close RMA to report on the action button usage
What Is the Refund Button
The Refund button allows you to create an instant credit or a return merchandize authorization (RMA) for selected line items on an order.

You can not issue a partial refund the same day payment is captured. The gateway sees any refund attempt the same day as a capture attempt as void of the total price.
Making The Connection
Where Will I See This Within OLX?
The refund button is only visible on the Order Detail Screen.
What Reports Can Be Pulled?
What Imports/Exports Relate to Refunds
Unless you have worked with a programmer to develop a custom report, there are no import/exports specifically for refunds.
Trouble Shooting
I Don't See The Item I am Looking For
If you do not see any items listed on the RMA Details screen or the specific item you're wishing to create a refund for, check the item status of each line on the order. If you find the item status is in an acceptable status open a ticket to have an OrderLogix Customer Care Representative review the order.

The following statuses are eligible to be processed for refund:
- Item Ship Ready,
- Item Awaiting Ship Confirm,
- Item Shipment Delivered,
- Item Paid,
- Item Shipment Cancelled, and
- Service Complete
I Didn't Mean To Create the RMA/Credit
Created the wrong type of refund? Not a problem.
- Find the line item created (look for the line item listed in red)
- Click the edit pencil icon
- Click the Delete button
- Click OK
on the popup confirming this is the line item you wish to delete
- Verify line item is no longer visible on the order

A CS Event will be displayed on the Customer Detail Center for sys:Action Delete with Reason DELETE_ITEM
Setup
When you are reviewing the Order Detail page you will notice a Refund action button nestled between the customer information and order line-item records.
Issuing an RMA - Return Merchandise Authorization
- Select Refund Type of RMA
- Set the Expiration Date if you would like it different than the auto populated date
- Select from the dropdown under Sold if you are creating a Refund or an Exchange.
- You can edit the quantity, price, shipping and handling, and tax values in the Refund row underneath the original values.
- For each item you want to refund or exchange, check the Process box.
 If an item has already been issued an RMA or a refund, a warning will appear. Hovering over the icon will show a message saying how much of a previous credit or RMA amount was issued.
 - If you want to select all the items, click the Check All link.You must select at least one item to create the refund.
- If you want to deselect all the items, click the Uncheck All link.
- Choose a return reason from the Return Reason drop down list.You must enter a reason code to save the refund.
- Enter any comments about the refund in the notes field.
- Click the Save button
. A dialog box will appear with the RMA number:
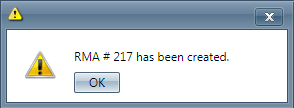
The Refund/RMA Input window will close and a new RMA or credit will be added to the order screen.
A CS Event will be created for sys:Open RMA on the Customer Detail Center
- To cancel any of the current changes you have made, click the Cancel button
. This will close the Refund/RMA Input window without saving any changes.
Closing RMA
After opening an RMA for a credit, you can access the RMA Details window on the Order Detail Screen by clicking on the item status of "Item Awaiting Return;" which will bring up the RMA Details Window:
- The credit will not be granted until the amount approved has been entered and the RMA is closed.
- Select which account to process the refund via:
- Same as Debit Account - this will use the same payment account that the original order was processed with.
- External Refunds - this will use the external account denoting that a paper check or other method outside of Orderlogix will be used.
- Select which account to process the refund via:
- Enter the credit amount in the Price field.
- If there is shipping tax applicable that you wish to credit, enter it into the appropriate field.
- Click the checkbox under "Close?" to close the RMA.
- Select a Reason code from the drop down menu.
- Enter Comments in the designated field.
- Click the Save button
, the RMA will be closed and the Credit will be pending. Once payment processing has completed the item will move to Item Refund Accepted.
- To cancel any of the current changes you have made, click the Cancel button
. This will close the RMA Details window without saving any changes.
A CS Event will be created for sys:Close RMA on the Customer Detail Center
Issuing a Credit
- Select Refund Type of Credit
- Select which account to process the refund via:
- Same as Debit Account - this will use the same payment account that the original order was processed with.
- External Refunds - this will use the external account denoting that a paper check or other method outside of Orderlogix will be used.
- You can edit the quantity, price, shipping and handling, and tax values in the Refund row underneath the original values.
- For each item you want to refund or exchange, check the Process box.If an item has already been issued an RMA or a refund, a warning will appear. Hovering over the icon will show a message saying how much of a previous credit or RMA amount was issued.
- If you want to select all the items, click the Check All link.You must select at least one item to create the refund.
- If you want to deselect all the items, click the Uncheck All link.
- Choose a return reason from the Return Reason drop down list.You must enter a reason code to save the refund. This will be displayed on the CS Event.
- Enter any comments about the refund in the notes field.
- Click the Save button
The Refund/RMA Input window will close and a new RMA or credit will be added to the order screen.
A CS Event will be created for sys:Instant Credit on the Customer Detail Center
- To cancel any of the current changes you have made, click the Cancel button
Copyright 2019
Revised 5.11.2026
Related Articles
Cancel Item
Module: Order Detail Page Path: Topic: Cancel Item Version(s): Version 5.1 and up Editions: Standard, Commerce, Call Center You can use Reports > Customer Service Reports > Customer Service Activity filtering for Activity = sys:Actions Cancel to ...Item Status Definitions
Item Status The Item Status field in the Order History section of the page has a link that will pull up the payment and shipment transaction details for that specific item. The transaction payment details will show which payment batch the item was ...Mark Item Paid
Module: Order Detail Page Topic: Mark Item Paid Version(s): Version 5.1 and up Editions: Standard, Commerce, Call Center You can use Reports > Customer Service Reports > Customer Service Activity filtering for Activity = sys:Actions Mark as Paid to ...Process Item(s) RealTime
Module: Order Detail Page Topic: RealTime Payment Processing Version(s): Version 5.1 and up Editions: Standard, Commerce, Call Center You can use Reports > Customer Service Reports > Customer Service Activity filtering for Activity = sys:Actions ...Item List
Module: Product Data Topic: Item List Version(s): Version 5.1 and up Editions: All Editions What Are Product Items? Product Items are the base items that connect the Product Offers and Inventory Items to allow an item to be sold for a set price and ...