Notification Queue

Module: Notification
Path: Processing > Notification > Notification Queues
Topic: Notification Queues
Version(s): 5.1
Editions: All
What Is Notification Queues
Notification Queues are used to internally notify agents of customer orders that did not end as a successful sale, to call back and potentially save the sale.
Making The Connection
Where Will I See This Within OLX?
You will see this by clicking on the Sales main menu and navigating to the Sales Overview page.
What Reports Can Be Pulled?
- Call Type Disposition Report Definitions (orderlogix.com)
- Agent Call Disposition Report Definitions (orderlogix.com)
- Call Type Disposition Report_3.5 (orderlogix.com)
- Lead List Report Definitions (orderlogix.com)
- Notification Penetration Report Definitions (orderlogix.com)
What Imports/Exports Relate to Notification Queues?
- at this time there are no imports/exports
How Does It Work?
When creating the script, you select the dispositions that are allowed to be selected in order to exit the order entry screen. You need to determine which dispositions will trigger adding the order to the notification queue so that an agent can call the customer back at a later time to try to save the sale.
Once the queue is setup (see below), agents will navigate to the Sales Overview screen by clicking on the Sales menu, and click on Get Next on the Notification Queue
Setup
Notification Queues
Tool Bar
Utilizing the buttons on the tool bar 
you can:
Go back to the previous screen 
Add new 
Print 
Minimize module 
Filter
You can use the filter options to narrow down the displayed selections.
- Queue Name
Add additional filters by click the Add button 
Apply the filtered selections by clicking Apply Filter 
Remove the filtered selections by clicking Remove Filter 
To show inactive accounts in the displayed records check Show Inactive 
You can set the number of records to be displayed
Add New
- To edit an existing record, click on the edit pencil next to the record you wish to edit.
- To add a new record, click on the Add New button in the blue module bar.
- A new window will pop up.
- Enter Queue Name
* To save the changes click the Save button  .
.
* To cancel any of the current changes you have made click the Cancel button  .
.
This will close the window without saving any changes.
* To apply the current changes you have made click the Apply button  .
.
* To print the current window click the Print button  .
.
* To delete the selection click the Delete button  .
.
This will prompt you to make sure you want to delete this item.
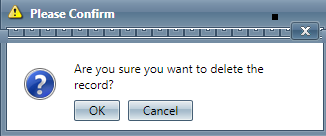
- Clicking OK will delete the selected item and close the window.
Notification Queue Templates
Tool Bar
Utilizing the buttons on the tool bar  you can:
Add new
Print
Minimize module
Filter
You can use the filter options to narrow down the displayed selections.
- DNIS
- Initial Delay
- Name
- Notification Template
- Queue Name
Add additional filters by click the Add button
Apply the filtered selections by clicking Apply Filter
Remove the filtered selections by clicking Remove Filter
To show inactive accounts in the displayed records check Show Inactive
You can set the number of records to be displayed
Add New
- To edit an existing record, click on the edit pencil next to the record you wish to edit.
- To add a new record, click on the Add New button in the blue module bar.
- A new window will pop up.
- Name
- Notification Queue - dropdown will display queues created above
- Notification Template - dropdown will display already created Notification Templates
- Campaign - dropdown will display already created Campaigns
- or you can create a new Campaign by clicking on the add new icon
- Source - dropdown will display already created Sources
- or you can create a new Source by clicking on the add new icon
- Initial Delay
- Time dropdown
- Minutes
- Hours
- Days
- Weeks
* To save the changes click the Save button .
* To cancel any of the current changes you have made click the Cancel button .
This will close the window without saving any changes.
* To apply the current changes you have made click the Apply button .
* To print the current window click the Print button .
* To delete the selection click the Delete button .
This will prompt you to make sure you want to delete this item.
- Clicking OK will delete the selected item and close the window.
Copyright 2019
Revised 9.17.2024
Related Articles
Notification Queue Templates
Module : Notifications Topic : Notification Queue Templates Version(s) : Version 5.1 and up Editions : All Editions Navigate to Company Data>Notifications>Notification Queue Templates. Click on the Add button to add a new notification queue ...Internal Notification Queue
Module : Internal Notification Queue Path : Sales or Customer Service Overview pages Topic : Callback Queue Version(s) : Version 5.1 and up Editions : Call Center Edition Notification Queue The Notification Queue allows outbound call backs to be ...Notification Management
Module : Notifications Path: Processing > Notifications > Notification Management Topic : Notification Management Version(s) : Version 5.1 and up Editions: Commerce & Call Center What Is Notification Management This is where you can create custom ...5.1.13 - Notification Improvements
Version: 5.1 Patch: 013 Title: Notification Improvements Application Category: Other Patch Type: Feature Description: The internal notification queue (seen on CS and Sales overview pages) now launches in an integrated window and has in improved look ...Notification Templates
Module: Notifications Path: Processing > Notifications > Notification Template Topic: Notification Set up Version(s): Version 5.1 and up Editions: All Editions What Are Notifications Are programmable system communications between you and your agents ...