Notification Templates

Module: Notifications
Path: Processing > Notifications > Notification Template
Topic: Notification Set up
Version(s): Version 5.1 and up
Editions: All Editions
What Are Notifications
Are programmable system communications between you and your agents as well as you and your cust
Making The Connection
Where Will I See This Within OLX?
You will see notifications on the Customer Detail Page Customer Detail Page (orderlogix.com) and under Process History for Job Type contains Notification.
What Reports Can Be Pulled?
- at this time there are no reports
What Imports/Exports Relate to Notification Templates/Grid
- at this time there are not imports/exports related to notification templates/grids
Trouble Shooting
Customer is not receiving notifications
- Check the customer record to see what the No Soliciting setting is set to
- True will keep notifications from sending to this customer
- False will allow notifications to send to this customer
- Check the Notification Management to make sure the scripts are selected correctly
Setup
Notification Templates
Navigate to the Notification Setups module from the Processing menu. (Processing > Notifications > Notification Setup)
Tool Bar
Utilizing the buttons on the tool bar  you can:
Go back to the previous screen 
Add new 
Print 
Minimize module 
Filter
You can use the filter options to narrow down the displayed selections.
- Description
- Template Name
- Type
Add additional filters by click the Add button 
Apply the filtered selections by clicking Apply Filter 
Remove the filtered selections by clicking Remove Filter 
To show inactive accounts in the displayed records check Show Inactive 
You can set the number of records to be displayed
Add New
- To copy an existing record, click on the copy button next to the record you want to copy.
- To edit an existing record, click on the edit pencil next to the record you wish to edit.
- To add a new record, click on the Add New button in the blue module bar.
- A new window will pop up.
- Enter the name of the notification template.
- Select the type of notification template you wish to use from the drop-down list. The type of grid's and alias' you can insert will depend on the type of notification template you select.
- Subscription
- Call
- Lead
- Sale
- Enter the "from name" of the sender, which applies if it is an email notification.
- Email Profile drop down
- Enter the "from Address" that you want the customer to see if an email notification is.
- alert icon
- Enter the subject line (if you are setting up an email notification) that you want the customer to see.
- Enter a description for the notification, which is for use within OrderLogix, and does not get sent to the customer.
- If you are setting up an "internal" notification, you can choose a calling profile from the drop-down list, which will alert the employee if they are going to call outside of acceptable time frames.
- To insert a notification grid, select it from the drop-down list and click the Insert button. This will place a predefined grid into your notification template.
- To insert an alias into the notification template, select it from the drop-down list and click the Insert button. This will place an alias into your notification template.
- Enter the "BCC Address" that you do not want the customer to see if an email notification is.
- Enter the body of the notification template. You can alter the way the body looks by using the various tools located on the toolbar. To view the list of tools and what they do, click the Help icon.

If invalid aliases are detected, the user will be prompted and given the option to remove the aliases automatically. This feature will also remove java script blocks and style classes which do not work in most email clients (inline styles on elements, which are the recommended way to style emails is still allowed).

Suggested reading related to HTML emails:
https://customer.io/blog/how-to-make-css-play-nice-in-html-emails-without-breaking-everything/
- Design
- To view the notification template in simple form.
- HTML
- To view the notification template in HTML code.
- Preview - this will remove the ability to edit the template

You cannot delete when you are trying to add a new notification template
* To save the changes click the Save button  .
.
* To cancel any of the current changes you have made click the Cancel button  .
.
This will close the window without saving any changes.
* To apply the current changes you have made click the Apply button  .
.
* To print the current window click the Print button  .
.
* To delete the selection click the Delete button  .
.
This will prompt you to make sure you want to delete this item.
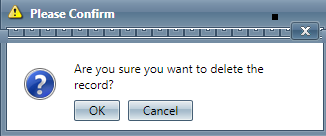
- Clicking OK will delete the selected item and close the window.
Notification Grids
Tool Bar
Utilizing the buttons on the tool bar  you can:
Add new
Print
Minimize module
Filter
You can use the filter options to narrow down the displayed selections.
- Grid Name
- Type
Add additional filters by click the Add button
Apply the filtered selections by clicking Apply Filter
Remove the filtered selections by clicking Remove Filter
To show inactive accounts in the displayed records check Show Inactive
You can set the number of records to be displayed
Add New
- To copy an existing record, click on the copy button next to the record you want to copy.
- To edit an existing record, click on the edit pencil next to the record you wish to edit.
- To add a new record, click on the Add New button in the blue module bar.
- A new window will pop up.
- Grid Name
- Category
- Call
- Lead
- Sale
- Width
- Grid Type - drop down list will adjust depending on Category above that is selected.
- Call Category
- Product Offers
- Lead Category
- Original Order Details
- Product Offers
- Sale Category
- Credit Status
- Credit Status - No installments
- Multi Tracking Details
- Order Details
- Order Details - No Installments
- Product Offers
- Shipped Order Details
- Shipped Order Details - No Installments
- Tracking Details
- Tracking Details - No Installments
- Include Header
- Include Footer
- Add Column - selection will adjust depending on Grid Type selected above
- Call Category
- Product Offers Grid
- Description
- Guarantee
- Product
- Product Group
- Rush Fee
- Shipping
- Subtotal
- Unit Price
- Lead Category
- Original Order Details Grid
- Description
- FedTax
- Product
- Qty
- Shipping
- Status
- Subtotal
- Tax
- Unit Price
- Product Offers Grid
- Description
- Guarantee
- Product
- Product Group
- Rush Fee
- Shipping
- Subtotal
- Unit Price
- Sale Category
- Credit Status Grid
- Description
- FedTax
- Offer
- Product
- Qty
- Shipping
- Status
- Subtotal
- Tax
- Unit Price
- Credit Status - No installments Grid
- Description
- FedTax
- Product
- Qty
- Shipping
- Status
- Subtotal
- Tax
- Unit Price
- Multi Tracking Details Grid
- Carrier
- Ship Date
- Tracking Link
- Order Details Grid
- Description
- FedTax
- Hold Until Date
- Offer
- Product
- Qty
- Shipping
- Status
- Subtotal
- Tax
- Unit Price
- Order Details - No Installments Grid
- Description
- FedTax
- GST
- Hold Until Date
- Product
- PST/HST
- Qty
- Shipping
- Status
- Subtotal
- Tax
- Unit Price
- Product Offers Grid
- Description
- Guarantee
- Product
- Product Group
- Rush Fee
- Shipping
- Subtotal
- Unit Price
- Shipped Order Details Grid
- Description
- FedTax
- Offer
- Product
- Qty
- Shipping
- Status
- Subtotal
- Tax
- Unit Price
- Shipped Order Details - No Installments Grid
- Description
- FedTax
- Product
- Qty
- Shipping
- Status
- Subtotal
- Tax
- Unit Price
- Tracking Details Grid
- Carrier
- Offer
- Ship Date
- Tracking Link
- Tracking Details - No Installments Grid
- Carrier
- Ship Date
- Tracking Link
- Sum Column
- Preview
* To save the changes click the Save button .
* To cancel any of the current changes you have made click the Cancel button .
This will close the window without saving any changes.
* To apply the current changes you have made click the Apply button .
* To print the current window click the Print button .
* To delete the selection click the Delete button .
This will prompt you to make sure you want to delete this item.
- Clicking OK will delete the selected item and close the window.
Copyright 2019
Revised 10.07.2024
Revised 10.07.2024
Related Articles
Notification Queue Templates
Module : Notifications Topic : Notification Queue Templates Version(s) : Version 5.1 and up Editions : All Editions Navigate to Company Data>Notifications>Notification Queue Templates. Click on the Add button to add a new notification queue ...Notification Management
Module : Notifications Path: Processing > Notifications > Notification Management Topic : Notification Management Version(s) : Version 5.1 and up Editions: Commerce & Call Center What Is Notification Management This is where you can create custom ...Notification Queue
Module: Notification Path: Processing > Notification > Notification Queues Topic: Notification Queues Version(s): 5.1 Editions: All What Is Notification Queues Notification Queues are used to internally notify agents of customer orders that did not ...Notification Grids
Module: Notifications Path: Processing > Notifications > Notification Templates > scroll down to Notification Grids Topic: Notification Grids Version(s): Version 5.1 and up Editions: All Editions What Are Notification Grids Notification Grids allow ...Dunning Letter Notification
Module: Dunning Letters Processing > Notifications > Dunning Letter Notifications Topic: Dunning Letters Notification Version(s): 5.1 Editions: All What Is A Dunning Letter Dunning Letters are notifications that an account is delinquent and the ...