Media Schedules

Module: Media
Path: Campaigns > Media > Media Schedules
Topic: Media Schedules
Version(s): Version 5.1 and up
Editions: Call Center
What Are Media Schedules
The Media schedules area is where you set up time slots for your ads to run, the amount of money to be spent on the schedule, the number of runs for the ad, and DNIS to link to a Campaign.

Making The Connection
Where Will I See This Within OLX?
This is for reporting purposes.
What Reports Can Be Pulled?
- Run Schedule Report Definitions (orderlogix.com)
- Return On Investment Report Definitions (orderlogix.com)
- Call Projection Report Definitions (orderlogix.com)
- Media Source List Report Definitions (orderlogix.com)
What Imports/Exports Relate to Media Schedules
Trouble Shooting
There is already a media schedule for this DNIS at this time on a station within the maximum station distance (or an exclusive station). Please enter a different DNIS, a different time or a different station.
- navigate to Campaigns > Media > Station and review settings
Setup
Tool Bar
Utilizing the buttons on the tool bar  you can:
Go back to the previous screen 
Add new 
Print 
Minimize module 
Filter
You can use the filter options to narrow down the displayed selections.
- # of Runs
- Ad Copy
- Campaign
- Client
- DNIS
- End Date
- End Date/Time
- End Time
- is DNR?
- Pay Type
- Spend Amount
- Start Date
- Start Date/Time
- Start Time
- Station/Media Format
Add additional filters by click the Add button 
Apply the filtered selections by clicking Apply Filter 
Remove the filtered selections by clicking Remove Filter 
You can set the number of records to be displayed
Add New
- To copy an existing record, click on the copy button next to the record you want to copy.
- To edit an existing record, click on the edit pencil next to the record you wish to edit.
- To add a new record, click on the Add New button in the blue module bar.
- A new window will pop up.
- Select the Ad Copy or click the
 Add button to add a new one.
 - Choose a Station/Media format from the drop down list to add to this Media schedule or click the Add button to add a new one.
- This media format is defined when setting up Stations.
 Note: The station/format list is dependent on the Ad Copy selected. Only stations which have the same Media Type as the Ad Copy and Formats selected for that station will appear.
- Enter the Start Date.
- Enter the Start Time.
- Enter the End Date.
- Enter the End Time.
- Enter the Spend Amount. This is the amount to be spent on the media.
- Enter the number of Runs of the media.
- Enter a DNIS to be used as part of the media schedule.Note: You cannot use more than one media schedule with overlapping run times which have the same DNIS already assigned to a Station that is set to exclusive.
- Check is DNR if the media schedule did not run.
* To save the changes click the Save button  .
.
* To cancel any of the current changes you have made click the Cancel button  .
.
This will close the window without saving any changes.
* To apply the current changes you have made click the Apply button  .
.
* To print the current window click the Print button  .
.
* To delete the selection click the Delete button  .
.
This will prompt you to make sure you want to delete this item.
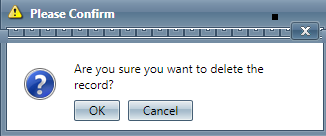
- Clicking OK will delete the selected item and close the window.
Copyright 2019
Revised 8.06.2024
Revised 8.06.2024