Payment Proc Accounts
 Module: Payment Data
Path: Campaigns > Payment Data > Payment Proc Accounts
Topic: Adding & Editing Pay Proc Accounts
Version(s): Version 5.1 and up
Editions: All Editions

Should you have a need to migrate to a new Payment Processor please see article Migrating to a New Processing Account
What Are Payment Processing Accounts (PPA)?
Payment Processing Accounts (PPA) are individual accounts created per payment gateway.
Making The Connection
Where Will I See This Within OLX?
Reference to PPA's can be found on multiple screens in OLX:
- Manage Scripts > Script Properties
- Order Entry > Submit Transaction Popup
- Order Detail
- Create Payment Batches
- Order Import
- RMA's
What Reports Can Be Pulled?
- Real Time Auth Report Definitions (orderlogix.com)
- Payment Batch Report Definitions (orderlogix.com)
- Cash Flow Report Definitions (orderlogix.com)
- Return Analysis Report Definitions (orderlogix.com)
- Void Report Definitions (orderlogix.com)
What Imports/Exports Relate to xxxx
- Currently there are no import nor exports for creating or editing PPA's
Trouble Shooting
Tokenization
- A token can only be used in the account is created in.
- A payment profile that has been tokenized will fail payment processing if attempting to process payment in any other payment account
Errors From Order Entry
- No response from processor - manual verification and settlement is required. /Error --> No processor selected for this account. Please review account Settings. Source --> PaymnetProcessing
- Navigating to Company Data > Payment Data > payment Proc Accounts, edit the account you created. Top right you will see a dropdown in the field of Payment Processor. Verify the correct Gateway is selected. If it is not correct or nothing selected, click on the dropdown and select the Gateway the account is connected to.
Setup
Navigate to Company Data > Payment Data> Payment Processing Accounts
Tool Bar
Utilizing the buttons on the tool bar  you can:
Go back to the previous screen 
Add new 
Print 
Minimize module 
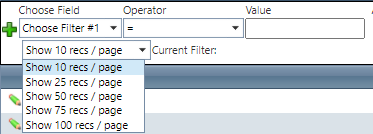
Filter
You can use the filter options to narrow down the displayed selections.
- Account Name
- Account Number
- Account Type
- Client
- Merchant Name
Add additional filters by click the Add button 
Apply the filtered selections by clicking Apply Filter 
Remove the filtered selections by clicking Remove Filter  You can set the number of records to be displayed
Add additional filters by click the Add button
Apply the filtered selections by clicking Apply Filter
Remove the filtered selections by clicking Remove Filter
You can set the number of records to be displayed
Add New
- To copy an existing record, click on the copy button next to the record you want to copy.
- To edit an existing record, click on the edit pencil next to the record you wish to edit.
- To add a new record, click on the Add New button in the blue module bar.
- A new window will pop up.
- Enter an account name
- Enter an environment ID
- Production - will connect to your gateways production/live account
- Test - will connect to your gateways sandbox account and will have set credentials that are different than the production credentials
- If applicable, select the default client export spec from the drop-down list
- If applicable, enter an account type (depending on type selected there will be checkbox types that will open up for selection)
- Credit Card - check the options below that are allowed to process with this account
- American Express
- Discover
- Visa
- Mastercard
- Allow Tokenization *This requires your gateway to be coded for tokenization. Please contact Customer Care if you are unsure if your system is setup for this*
- checked - account will display on Script and on Customer Payment Profile
- Ignore past expiration dates -
- checked - expiration date will not be validated for tokenized payments processed with this account, so that items are not made Invalid during
- prepayment processing - Please note you will want to make sure you have Account Updater feature turned on via the gateway you are using. Most gateways offer this as a paid feature.
- unchecked
- unchecked - account will not display in dropdowns within the system for tokenization
- External
- checked - payment processor must = None.
- Payment batch creates that will not communicate outside OrderLogix. Payments will be processed via methods outside OrderLogix but allows a way to record information about that transaction within the system
- unchecked - payment processor must be selected
- ECheck
- External
- checked - payment processor must = None.
- Payment batch creates that will not communicate outside OrderLogix. Payments will be processed via methods outside OrderLogix but allows a way to record information about that transaction within the system
- unchecked - payment processor must be selected
- Check/Money Order
- Import
- External
- checked - payment processor must = None.
- Payment batch creates that will not communicate outside OrderLogix. Payments will be processed via methods outside OrderLogix but allows a way to record information about that transaction within the system
- unchecked - payment processor must be selected
- This setting sets the Default setting for payment processing when using this PPA. If the user has the correct permissions, they can override this setting on the Create Payment Batches screen and Order Detail Process popup
- Payment Processor
- only gateways with a purchased integration will display in dropdown
- Authorize.Net - Payment Processing Account With Tokenization
- Braintree - Payment Processing Account Token Generation
- Mercado Pago Payment Processor
- NMI - Payment Processing Account With Tokenization
- PayPal NVP_Express Checkout
- Shopify Payments
- Stripe - Payment Processing Account Token Generation
- once gateway is selected, remaining fields below will adjust according to the needs of the integration
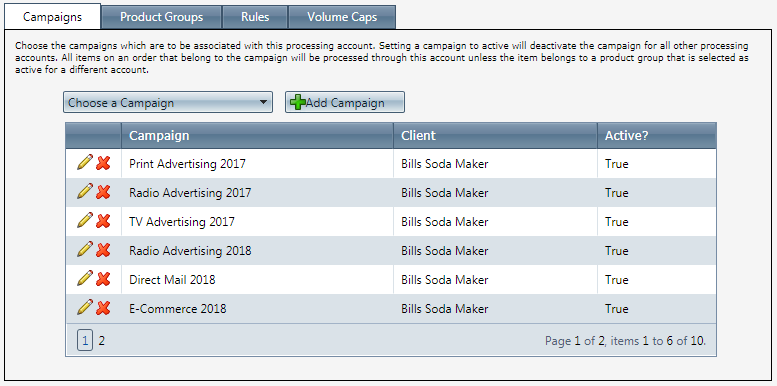
Click on the Campaigns tab to choose the campaigns that will be processed on this account.
Campaigns

Note: If a campaign is not attached to a payment processing account the items placed on orders with that campaign will not be payment processed unless the items belong to a product group that is associated with a payment processing account.
- To add a campaign to the datagrid select one from the drop down list and click the Add button. This will add the campaign to the datagrid as inactive.
- To activate or deactivate a campaign in the datagrid, click the edit pencil next to the campaign you wish to activate/deactivate and click the Active check box.
- To remove a campaign from the datagrid, click the remove icon next to the campaign you wish to remove.
- Click on the Product Groups tab to choose the product groups that will be processed on this account.
Note: You can only associate campaigns with payment processing accounts that are of type Credit Card or ECheck.
Note: A campaign can only be active for one payment processing account of the same type at a time. If you try to activate a campaign that is already active for another payment processing account of the same type you will be alerted and can either deactivate the other campaign or not.
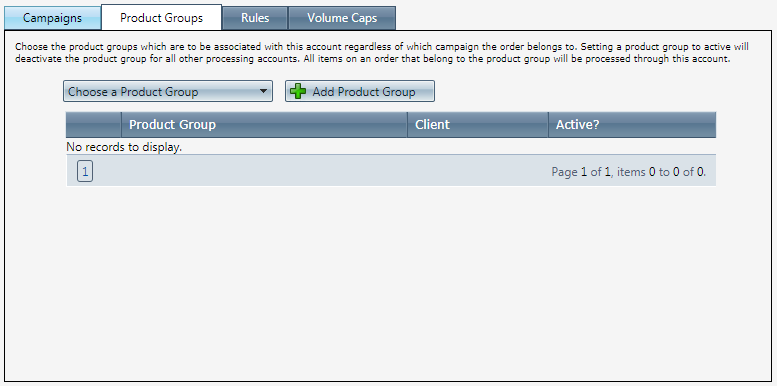
Product Groups
- To add a product group to the datagrid select one from the drop down list and click the Add button. This will add the product group to the datagrid as inactive.
- To activate or deactivate a product group in the datagrid, click the edit pencil next to the product group you wish to activate/deactivate and click the Active check box.
- To remove a product group from the datagrid, click the remove icon next to the product group you wish to remove.Note: You can only associate product groups with payment processing accounts that are of type Credit Card or ECheck.Note: A product group can only be active for one payment processing account of the same type at a time. If you try to activate a product group that is already active for another payment processing account of the same type you will be alerted and can choose whether or not to deactivate the other product group.
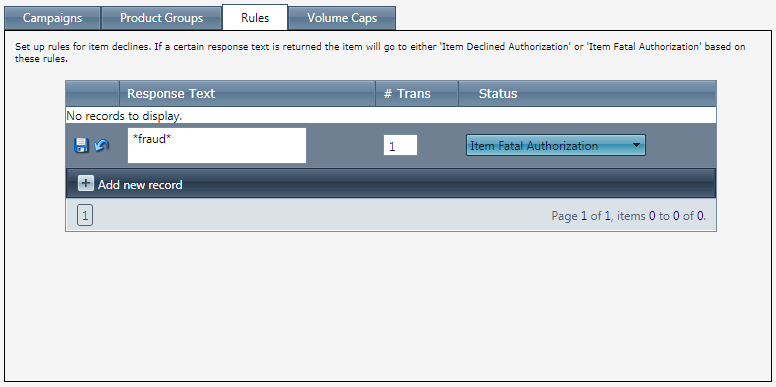
Rules
- To add a Rule to the datagrid click the
 Add hyperlink. This will display a field for the "Response Text" along with the item status that you wish to have the transaction move to if the response text occurs during a payment attempt. Note: The Response Text field needs to contain either the exact full response text from the payment gateway, or a partial response. If a partial response is entered, the content needs to be an exact match.
 - To save the payment processing rule, click the save floppy disk icon.
- To cancel the rule, click the cancel icon and the rule will not be saved.
Volume Caps (Load Balancing)
- To add Volume Caps select the tab and set the value for each field.
- Volume Caps allow you to limit the transactional amount processed to a given account over the course of a month / day respectively.
- When a given payment batch has processed enough transactions to surpass the Daily Cap by more than the $ Allowed Over Daily Cap amount or the Monthly Cap, the payment batch stops submitting transactions and removes the rest of the items that were originally assigned to the batch so that they can be put into a batch for another account.
- Each Transaction removed from the batch will get a CS note added to reflect that the transaction was removed from the batch due to processing limits being reached.
- You can link a payment batch creation schedule of a second merchant account, using the same product group settings, to the processing of a batch from this account's job in order to "Push" the transactions to the second merchant account for processing.

Orders using Tokenization cannot participate in Load Balancing - they will always fail. Make sure you do not setup Volume Caps on any account that utilizes Tokenization.
* To save the changes click the Save button  .
.
* To cancel any of the current changes you have made click the Cancel button  .
.
This will close the window without saving any changes.
* To apply the current changes you have made click the Apply button  .
.
* To print the current window click the Print button  .
.
* To delete the selection click the Delete button  .
.
This will prompt you to make sure you want to delete this item.
- Clicking OK will delete the selected item and close the window.
Related Knowledgebase Articles
Payment Processing Accounts
Copyright 2019
Revised 5.3.2022
Related Articles
Admin - Payment
Module: Customer Portal Path: Admin > Payment Topic: Payment OLX Version(s): 5.1 OLX Editions: Commerce, Call Center The settings configured under the Admin > Payment tab sets the parameters found on the Pay Methods tab. Options Allow customer to ...Create Payment Batches
Module: Create Payment Batches Path: Processing > Payment Processing > Create Payment Batches Topic: Create Payment Batches Version(s): All Editions: All What Are Payment Batches Payment Batches are when eligible orders are designated to export to ...Payroll Processing
Navigate to Processing>Payroll Processing. The Payroll Processing page is where you can process the amount of hours including paid and unpaid breaks, that employees have worked. Note: You need to have wages established in the Employee Data set up, as ...Payment Processing
Module: Payment Processing Path: Processing > Payment Processing Topic: Payment Processing Menu Version(s): 5.1 & up Editions: All What Is Payment Processing Menu? The Payment Processing page is where you can prepare orders for payment, charge Credit ...Pre-Payment Processing
Module: Pre-Payment Processing Path: Processing>Payment Processing>Perform Pre-Payment Processing Topic: Pre-Payment Processing Version(s): 5.1 and up Editions: All What Is Pre-Payment Processing Pre-Payment Processing is the first process that ...