Departments

Module: Human Resources
Path: Company > HR > Departments
Topic: Departments
Version(s): 5.1 & up
Editions: All Editions
What Are Departments
Departments set the shifts and wage to assign to an agent when they login to the system using the Timecard Management or Time Card.
Making The Connection
Where Will I See This Within OLX?
Departments are required to be setup on Add/View Employees Wages tab in order for agents to be able clock in with Timecard Management or Time Card.
What Reports Can Be Pulled?
What Imports/Exports Relate to Departments
- at this time there are no imports/exports specific to Departments
Trouble Shooting
Setup
Tool Bar
Utilizing the buttons on the tool bar 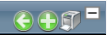 you can:
Go back to the previous screen 
Add new 
Print 
Minimize module 
Filter
You can use the filter options to narrow down the displayed selections.
- Client
- Department Name
- Department Number
Add additional filters by click the Add button 
Apply the filtered selections by clicking Apply Filter 
Remove the filtered selections by clicking Remove Filter 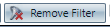
To show inactive accounts in the displayed records check Show Inactive 
You can set the number of records to be displayed
Add New
- To edit an existing record, click on the edit pencil next to the record you wish to edit.
- To add a new record, click on the Add New button in the blue module bar.
- A new window will pop up.
- Enter the Department Name.
- Select the Client
- Enter the Department Number.
Navigate down to the Shifts tab:
- Select a shift from the drop down
- Click the Add Shift button to add the shift selected to the lister page
- You can edit existing shifts by clicking the edit icon.
- Enter the hourly wage for this department/shift.
Navigate down to the Employee's tab to select the employees that can choose this department when punching into the timecard feature.
- To add the available employees to the selected list, click on the right arrow icon.
- To add all the selections on the available list to the selected list, click on the double right arrow icon.
- To remove a selection(s) from the selected list, select the selection(s) you wish to move and click on the left arrow icon.
- To remove all the selections from the selected list and put them back on the available list, click the double left arrow icon.
* To save the changes click the Save button  .
.
* To cancel any of the current changes you have made click the Cancel button  .
.
This will close the window without saving any changes.
* To apply the current changes, you have made click the Apply button  .
.
* To print the current window, click the Print button  .
.
* To delete the selection, click the Delete button  .
.
This will prompt you to make sure you want to delete this item.
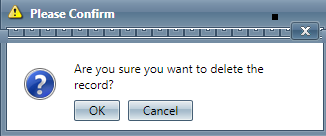
- Clicking OK will delete the selected item and close the window.
Copyright 2019
Revised 7.23.2025
Revised 7.23.2025
Related Articles
5.1.9 - Improved HR Screens
Version: 5.1 Patch: 009 Title: Improved HR Screens Application Category: Other Patch Type: Feature Description: All the screens under the HR menu have been updated with a new look & feel. This includes the User Wizard, Departments, Teams, and ...Human Resources Desktop
Module: Human Resources Topic: Desktop Version(s): Version 5.1 and up Editions: Commerce & Call Center Human Resources Permissions Only certain personnel will be granted access to the Human Resources tab through the menu navigation bar, as it ...Using The Help Desk
What is the Help Desk? The Help Desk is where you can: create and review support tickets review User Guide articles review Developer Specs Getting Started Creating User Please ask an Admin within your company to send an email to ...Add/View Employees
Module: Add/View Employees Path: Company > HR > Add/View Employees Topic: Add/View Employees Version(s): 5.1 & up Editions: all editions What is Add/View Employees The Add/View Employee section of OrderLogix allows you to set up and manage your ...Manage Module Permissions
Module: System Desktop Path: System > Manage Module Permissions Topic: Manage Module Permissions Version(s): Version 5.1 and up Editions: All What Are Module Permissions Module Permissions allow Read or Write access to users on a group or individual ...