Export Schedules

Module : Export Schedules
Topic : Module Overview
Version(s) : Version 5.1 and up
Editions : Standard, Commerce, Call Center
Navigate to Processing>Import/Export>Exports. When you click on the Show schedules button you will see some specific fields open up in the export screen:
FTP Delivery Method:
- Make all appropriate export selections for the schedule. Select the Client, Spec, and then the date range. Note: The date range is going to pertain to every time the schedule runs. For order files, selecting "no start date" will allow decline resubmissions to be included in the file should they collect payment weeks later, where as with media exports you will be more than likely to choose "rundate -1 through rundate -1" including only the previous day's `data.
- Select any/all partial order options for the export: "Require payment of all other items on the order and Require that ALL shippable items on the order are included in the export."
- Make the proper product group selections.
- Click on the Delivery tab to enter the schedule delivery data. There are 3 Delivery Methods to choose from in the drop down menu: FTP, Secure FTP and Email.
Note: By hovering over the "Information Icon" next to the delivery method drop down (which will only appear when FTP or Email is selected) you will see the following pop up message displayed:

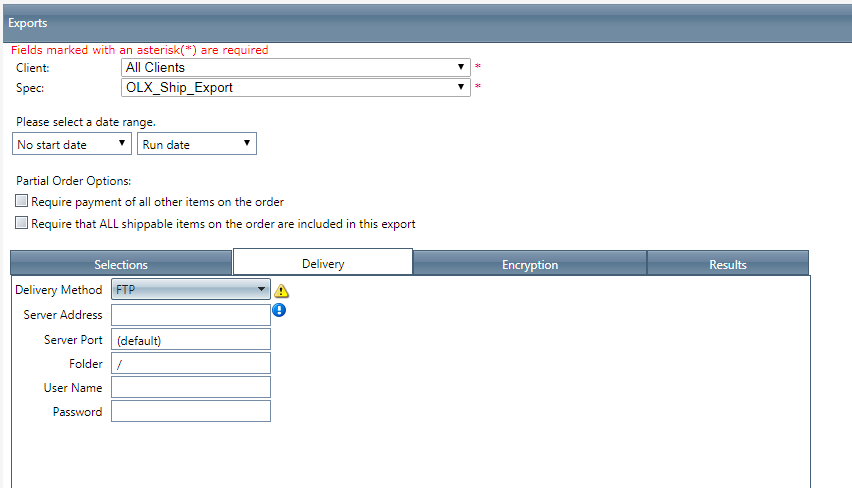
- Enter the Server Address for the FTP site.
- The default Port is 21 for FTP sites, however if this needs to be different please note the port number.
- If there is a specific folder that the file needs to be delivered to, be sure to enter the name of the folder in the Folder field and place a forward slash after the folder name. This is necessary for the file path to be directed correctly.
- Enter the User Name and Password for the FTP site.
- There will need to be encryption with this delivery method, of either ZIP or PGP. If selecting PGP Encryption method, a PGP key will need to be imported into OrderLogix in order for the system to encrypt the file should it contain sensitive information. (Please see PGP Keys for further information) For security, this is an imperative step for automated delivery if not delivering to a secure FTP site.
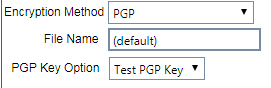
- Click on the encryption tab.
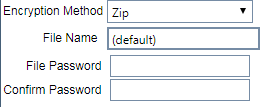
- Select the Encryption Method from the drop down menu of either PGP or zip.
- If you are selecting the Method "PGP" you need to select the desired PGP Key from the list of keys that have already been imported:
- If you choose to zip the file, enter the appropriate information including the "File password:"
 Note: By hovering over the "Validate icon" you are able to test the connection to the Server or Email address, that you are entering for the schedule.
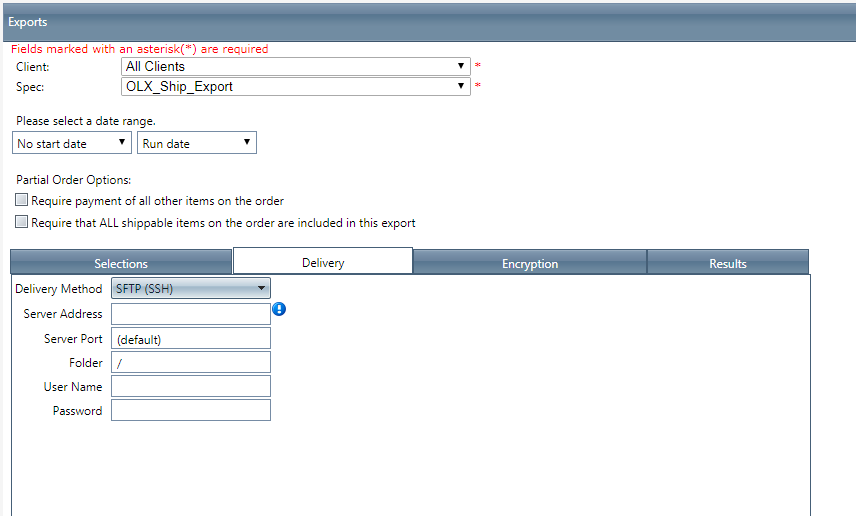
Secure FTP Delivery Method:
- Make all appropriate selections as seen above with the FTP instructions.
- You will see that there is one main difference with this delivery method selection, involving the abscence of the 'Information icon" next to the delivery method drop down menu. This is because the SFTP selection does not require an encryption method in order to automatically deliver files.
- Make all appropriate selections as seen above with the FTP instructions.
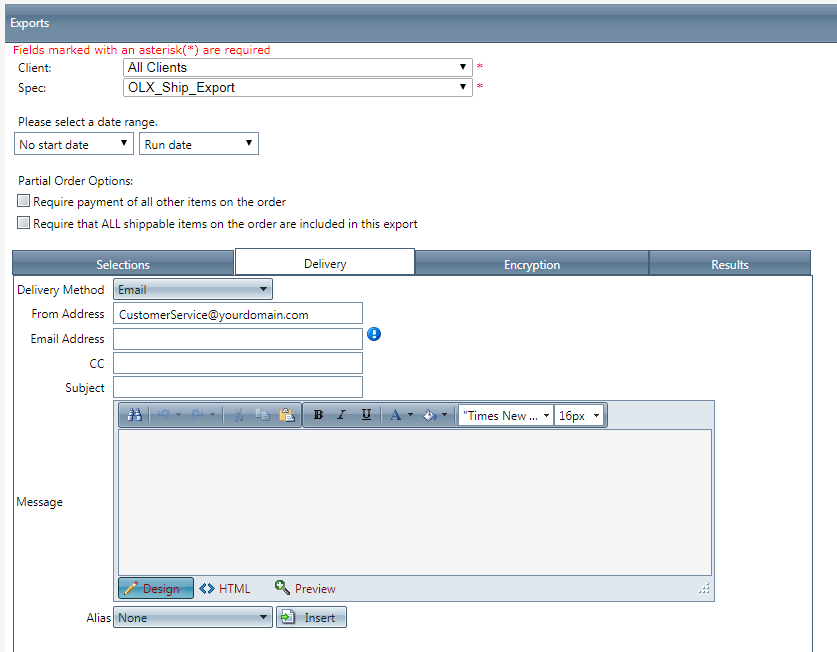
Email Delivery Method:
- Make all appropriate selections as seen above with the FTP instructions.
- Enter the From Address for the email that will contain the file as an attachment.
- Enter the email address that you are sending the file to.
- Enter any CC contacts on the email.
- Enter the subject of the email.
- Enter the body of the email which works exactly the same as "Process Alerts" which you see in greater detail within the general Automated Schedules section.
- Please see above information regarding the encryption tab and the choices you have regarding Email and FTP delivery.
Note: A fire wall rule will need to be created either through the OrderLogix support team (by request) if you are a hosted client, or by your IT team if you are an infrastructure client. The system blocks all egress connections from our network by default, so in order for OLCC to deliver files we must create explicit firewall rules to allow connections out of OLCC to your FTP server.
For general Schedule set up instructions, please see Automated Schedules .
- Click the Save button, the changes will be saved and the Edit Schedule window will close.
- To cancel any of the current changes you have made, click the Cancel button. This will close the Edit Schedule window without saving any changes.
Related Articles
Import Schedules
Module: Import Schedules Topic : Module Overview Version(s) : Version 5.1 and up Editions : Standard, Commerce, Call Center Navigate to Processing>Import/Export>Imports. When you click on the Show schedules button you will see some specific ...Shopify Ship Confirmation Export
Module: Export Path: Processing>Import/Export>Exports Topic: Shopify Ship Confirmation Export Version(s): 5.1 & up Editions: All What Is Shopify Ship Confirmation Export The Shopify Ship Confirmation Export is used to pass payment and fulfillment ...Shopify Order API Export
Module: Export Path: Processing > Import/Export > Exports Topic: Shopify Order API Export Version(s): 5.1 & Up Editions: All What IS Shopify Order API Export Shopify Order API Export allows you to export orders from your OLX instance into Shopify. ...Payment Batch Schedules
Module: Payment Processing Path: Processing > Payment Processing > Create Sales Topic: Create Payment Schedules Version(s): All Editions: All Payment Batch Schedules Navigate to Processing>Payment Processing>Create Sales. Click on the Show schedules ...Export Error: Server error 4: Failure
You may encounter one of the following errors when attempting to deliver/export a file to an FTP/SFTP/FTPs server: ---------------------------- Job starting... Attempting to send test file Unable to send test file. Server error (4): Failure ...