SIM Elements
 Module: SIM Elements
Path: Campaigns > Advertising > SIM Elements
Topic: Global Elements
Version(s): Version 5.1 and up
Editions: All Editions
What Are SIM Elements
If you want to create elements to be used across many different forms, you can create global elements. These differ from form specific elements in that they can be attached to any form. To create a global element, navigate to Company Data->Advertising->SIM Elements and click on the add icon or edit element icon.
Making The Connection
Where Will I See This Within OLX?
Elements display during SIM order entry.
What Reports Can Be Pulled?
- at this time there are no reports related to SIM setup
What Imports/Exports Relate to SIM Elements
- at this time there are no im/exports related to SIM setup
Trouble Shooting
inserting hyperlink isn't working
- when using the hyperlink manager
you must be sure to set the Target, by default it is set to None.
- editing an element to insert a new button via Design tab is removing the button above insertion point
- when this happens it's because the cursor was actually placed inside the code of the above action button (the code is displayed on the HTML tab) and you are removing the above action button
- one option to counteract this is to put your cursor at the end of the button already created, click the right arrow to move to start of next button/line, then click enter. You have now inserted a break and can use the up arrow to navigate to where you want to insert the new button.
- another option to counteract this is to
- Find the word in the Design view that you want to insert a button after.
- Go to the HTML view and find the word Yes next to "</span>". Place the cursor after "</span>" and press the Enter key a couple times to move the remaining code down.
- Enter <br> 3 times after "</span>"
- Go back to Design view and you should see blank spaces after Yes. Place the cursor in the middle of the blank space.
- You should be able to add a new button now.
Setup
This will open the Add/Edit Element window with the information described in the Add/Edit/Move Element section, but the ‘Save as Template’ button will not be visible. Every element created from this screen will be created as a global element template, that can be selected in the Add/Edit Element window. You can even create global elements using global elements that have already been saved.
You can also save an existing form specific element to be global by opening up the form, editing the element and clicking the ‘Save as Template’ button. This will save the element as a global template immediately, and it will appear in the global elements lister page. However, if a form specific element contains a form specific custom field; the element cannot be saved as a global template. All the fields in the element must be global or OLX fields
Tool Bar
Utilizing the buttons on the tool bar  you can:
Go back to the previous screen 
Add new 
Print 
Minimize module 
Filter
You can use the filter options to narrow down the displayed selections.
- Create Date
- Element Name
- Product Offer
Add additional filters by click the Add button 
Apply the filtered selections by clicking Apply Filter 
Remove the filtered selections by clicking Remove Filter 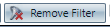
To show inactive accounts in the displayed records check Show Inactive 
You can set the number of records to be displayed
Add New
- To edit an existing record, click on the edit pencil next to the record you wish to edit.
- To add a new record, click on the Add New button in the blue module bar.
- A new window will pop up.
- Element Name - This is a required field
- Name will be defaulted to a generic name, however you can modify to be more specific.
- Elements display on the form alphabetically.
- Column - This is the divided space in the middle of the form between the Header and Footer.
- By clicking on the drop down you can move the element to a new section.
- Product Offer - is not used and will be removed from screen soon
- Width - How much space within the column will the Element utilize.
- Percent
- Pixels
- Choose an Element Template
- If you have created global elements (more information below) you can select them in this screen. Once you choose the global element from the drop-down list, you can click the insert element template button, and all of the information from the global element will be (copied) populated in the body of this element. You can make any changes desired, without modifying the existing global element. Any changes will only be specific to the element you are adding/editing.
- Insert Template - displays a copy of the element selected from the element template drop-down
- Border Width - thickness of border in pixels
- Background - select the color for the background of the element
- Pos-X - is not used and will be removed from screen soon
- Pos-Y - this is the order the element will show relative to other elements in the same column.
- Type - is not used and will be removed from screen soon
- Properties - this box will display available properties for the button/field selected that are able to be configured from the Element popup. Event driven interactive settings are configured outside the Element popup. See Interactive Settings below.
- The view of this box will adjust based on the button/field selected
- Products - you can search for product offers to create a button with the offer name as the label on the element and quantity set.
- search bar will display any product setup in system - is not filtered based off products added to script
- you will need to add offer to script if you select an offer not already assigned to script
- This sets action to Set Offer Attributes - any other actions will need to be set manually
- Product Offer - set when adding button to element
- Rush = Do Nothing
- Quantity - adjustable when adding button to element
- Selected Only? - unchecked
- Actions
- Action Button - adds a button with no preset configurations.
- Label
- this displays to the agents
- example:
- Type
- Button
- Checkbox
- Radiobutton (group 1-15)
- groups relate buttons together (only one item can be selected)
- Action
- User Defined
- You will have to assign/set interactive settings for the button.
- Go Home (form)
- Previous (form)
- Next (form)
- Go End (form)
- Collapsible Content - This inserts a two-section text field with a Title and Body. Title will display on screen for agents and will expand when clicked on. Will collapse when Title is clicked on a second time.
- Go Previous Button - adds a preconfigured button to navigate to the previous form.
- Go Home Button - adds a preconfigured button to navigate to the home form.
- Go to End Button - adds a preconfigured button to navigate to the end form.
- Go Next Button - adds a preconfigured button to navigate to the next form.
- Linked Field
- Does not save in database.
- You will have to assign/set interactive settings using an action button (navigation or preconfigured action button from element setup).
- Can also be used with custom SIM plugins
- Call/Order Fields - these are hardcoded buttons and fields found on classic order entry.
- You cannot edit these buttons.
- If you want to create custom fields to be used across many different forms, you can create global custom fields. These differ from form specific custom fields, in that they can be attached to any form. Navigate to Campaign > SIM Custom Fields
- OLX fields that can be added to an element which displays static information.
- OLX fields that can be added to an element to capture/view order information.
Label - Pre-Configured display only label Input - text box that sets information to be displayed when Label is used Pre-Configured Button Action of Pre-Configured Button AgentFirst BillAndShipSameCheck CopyBillToShipButton AgentLast ProcessButton CallStartDate ProductsTable CallStartTime SubmitButton Campaign ScheduleCallbackbutton DNIS WrapUpBlock EmployeeName EmployeeNumber OrderTotal ShipTotal SubTotal TaxTotal WebOrderNumber AccountNumber AccountNumber Age Age BankCity BankCity BankName BankName BankState BankState BillAddress1 BillAddress1 BillAddress2 BillAddress2 BillAddressBlock BillAddressBlock BillCity BillCity BillCountry BillCountry BillFirstName BillFirstName BillLastName BillLastName BillMiddleInitial BillMiddleInitial BillPhoneNumber BillPhoneNumber BillPMPhoneNumber BillPMPhoneNumber BillState BillState BillZipCode BillZipCode BirthDate BirthDate CallDispostion CallDispostion CallType CallType CCExpDate CCExpDate CCNum CCNum CheckNumber CheckNumber CompanyName CompanyName CustDemoNotesBlock CustDemoNotesBlock Custom1-5 fields Custom1-5 fields CVV2 CVV2 Debit Debit EmailAddress EmailAddress ExternalOrderNumber ExternalOrderNumber Gender Gender Location Location NoSolicit NoSolicit Notes Notes PackingSlipComments PackingSlipComments PayMethod PayMethod PayReferenceNo PayReferenceNo PhoneExtension PhoneExtension PromoCode PromoCode RoutingNumber RoutingNumber Savings Savings ShipAddress ShipAddress ShipAddress2 ShipAddress2 ShipAddressBlock ShipAddressBlock ShipCity ShipCity ShipCompanyName ShipCompanyName ShipCountry ShipCountry ShipFirstName ShipFirstName ShipLastName ShipLastName ShipMethodBlock ShipMethodBlock ShipMiddleInitital ShipMiddleInitital ShipPhoneNumber ShipPhoneNumber ShipPMPhoneNumber ShipPhoneNumber VoicePrintID VoicePrintID WarehouseComments WarehouseComments - Work Space - This is the section the agents will see during order entry.
- Format Tools - Enter the body of the Element. You can alter the way the body looks by using the various tools located on the format toolbar.
- View
- Design - this is WYSIWYG screen editor
- HTML - you can use HTML to design the form.
- Preview - you can preview the form to see how it will display to agents during a live call.
- Wrap Up Buttons
* To save the changes click the Save button  .
.
* To cancel any of the current changes you have made click the Cancel button  .
.
This will close the window without saving any changes.
* To apply the current changes you have made click the Apply button  .
.
* To print the current window click the Print button  .
.
* To delete the selection click the Delete button  .
.
This will prompt you to make sure you want to delete this item.
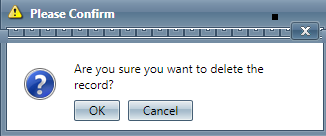
- Clicking OK will delete the selected item and close the window.
SIM - Global Elements
Copyright 2019
Revised 5.1.2025
Related Articles
SIM Custom Fields
Module: SIM Elements Path: Company Data > Advertising > SIM Custom Fields Topic: Global Custom Fields Version(s): Version 5.1 and up Editions: All Editions What Are SIM Custom Fields If you want to create custom fields to be used across many ...SIM - Script Form
Module: SIM Script Forms Path: Campaigns > Advertising > Script Forms Topic: Script Form Version(s): 5.1 Editions: Commerce and Call Center What Are SIM Forms? SIM Forms are guides for agents to follow during order entry. Making The Connection Where ...Manage Scripts: Elements
Module: Manage Scripts PATH: Campaigns > Advertising > Maintain Scripts Topic: Elements Version(s): Version 5.1 and up Editions: All Editions What Are Scripts Scripts are the rules setup for order entry, whether the order is entered into the system ...388 - SIM WIndow For Finder Codes
Version: 5.1 Patch: 388 Title: SIM WIndow For Finder Codes Application Category: Other, Order Entry Patch Type: Feature Description: Added support for SIM screen popup to display a selection window when there are multiple finder addresses found. ...20.2 p8 - Added SIM Address Popup Email Format Validation
Version: 5.1 Release Number: 20.2 Patch: 8 Title: Added SIM address popup email format validation. Application Category: Other, Order Entry Patch Type: Feature Description: Added email validation for the popup Billing/Address form for use on SIM ...