Sign In

Module: Customer Portal
Topic: Sign-In
OLX Version(s): 5.1
OLX Editions: Commerce, Call Center
Here at Orderlogix we strive to not only give you quality products and service, we also work diligently to help you make our product your own. Customization allows your company to put their personal touch on the Orderlogix products you are using. We have taken our Customer Portal to another level with such customization.
There are so many ways to incorporate Orderlogix Customer Portal into your already existing setup. You can use it as a stand alone product or embed it in your existing website. The possibilities are almost endless.
Because there are many different ways to incorporate the Customer Portal we are only documenting the standard sign-up and sign-in process. Once you have purchased the Customer Portal, if there are unique additions to this process or any other process your Orderlogix representative will guide you on those setups.

It is important to note that customer accounts are linked to their OrderLogix account by the email address. A customer cannot change their email address for their sign in except by creating a new portal account.
Register An Account
To create a self service account follow the steps outlined in the Customer Detail Page under the Customer Details & Profiles > Self Service Account section.
Once the customer has received their Invite Email they will click on the link provided to create an account and be directed to the Registration page.
In order to register their email and create a new account the following must be done:
- Enter their First name
- Enter their Last name
- Enter the email address **This must be the email address the invitation was sent to
- Enter a password
- Password must be at least 6 characters long.
- Passwords must have at least one non letter or digit character.
- Passwords must have at least one lowercase ('a'-'z').
- Passwords must have at least one uppercase ('A'-'Z').
- Passwords must have at least one digit ('0'-'9').
- Re enter the password for validation
- Select a security question
- Provide the answer to the security question
- Check the box agreeing to the Terms and Conditions
- Terms and Conditions is configured on the Admin > Messages > TOS Text tab
- Click Register
**The Register button will not activate until ALL required fields have been completed**
Create An Account
From the sign in page customers can click on Create Account button  show at the top right of the screen.
That will bring them to the Customer lookup page.
As you can see, the customer MUST provide their email address, first and last name.
What you see below may not match exactly to what your customers will see depending on the settings on the Admin > Accounts > Customer Lookup tab.
The potential fields that may be seen from here are:
- First Name
- Last Name
- Order Number
- Payment Amount
- CC Last 4
- Bill Phone Last 4
- Bill Phone Number
- Billing Zip
- Order Date
- After all of the required fields are completed the customer will click on the Send Link button
- If the customer clicks on the Send Link button prior to having the required information filled in they will see an error such as
- If the customer navigates to this page and realizes they already have an account, they can simply click on the Sign In button
seen at the top right of the screen and will be directed back to the Sign In page.
Sign In
Once your customer has an account created they will follow the link to your Customer Portal and arrive at the Sign In page.
The message displayed on this screen is configured on the Admin > Messages > Signin Text tab.
From here the customer will:
- Enter the email address they signed up with
- Enter their password
- Click the Sign In button
Forgot Password
Should the customer reach step 2 and realize they do not remember what password they created, they can click on the Forgot Password? link 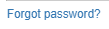 .
.
The customer will be redirected to a new page.
The message displayed here is not customized, it is the default Orderlogix Customer Portal message.
Here the customer will enter their email address they signed up with and click the Reset Password button  .
.
A new page will display confirming that an email has been sent to the provided address. The Password Reset email is configured on the Admin > Accounts > Password Reset tab.
An example of the email received by the customer is shown below:
The link provided within the Click here text will direct your customer to the Password Reset page.
The message displayed here is not customized, it is the default Orderlogix Customer Portal message.
Customer will:
- Enter their email address
- Enter a new password
- Password must be at least 6 characters long.
- Passwords must have at least one non letter or digit character.
- Passwords must have at least one lowercase ('a'-'z').
- Passwords must have at least one uppercase ('A'-'Z').
- Passwords must have at least one digit ('0'-'9').
- Confirm the new password
- Answer the security question they setup when they first created their account.
- Click the Reset Password button
The screen will display that the password was reset and provide a Return to Sign-in button to take the customer back to the sign in page and allow them to login with their new password.
Related Articles
Navigating Customer Portal
Module: Customer Portal Topic: Navigation OLX Version(s): 5.1 OLX Editions: Commerce, Call Center This feature is currently in Beta, please contact Customer Care if you are interested in becoming a user of this feature. Customer Portal Customer ...Profile
Module: Customer Portal Path: Profile Topic: Profile OLX Version(s): 5.1 OLX Editions: Commerce, Call Center The Profile tab within Customer Portal will allow your customer to change their password and/or request to have their personal information ...5.1.353 - SIM Set Attribute Qty Increment Decrement
Version: 5.1 Patch: 353 Title: SIM Set Attribute Qty Increment Decrement Application Category: Other, Order Entry Patch Type: Feature Description: Modified Set Attributes action in SIM to make relative adjustments to the quantity of an item. ...Login/Logout Process
Module: Home Path: https://login.orderlogix.com Topic: Login/out Version(s): 5.1 Editions: All once you have been migrated to Azure you will want to update any bookmarks you have and use https://login.ordermanagement.com What Is The Login Screen The ...Exports
Module: Exports Topic: Module Overview Version(s): Version 5.1 and up Editions: Standard, Commerce, Call Center What Are Exports The exports page is where you can export order, media, call, and other various types of information from OrderLogix to ...