SIM - Adding/Editing Columns
Editing the Header/Footer
By default the header and footer will have a height of zero pixels which will make them invisible when rendered. To edit the height of the header or footer you can double click the header/footer node on the form tree or right click and select ‘Edit Column’:
This will open the Add/Edit Column window with header/footer specific information.
Note: The Add/Edit Column window for the header and footer differ slightly from regular columns, in that you cannot edit the name and you are setting a height in pixels instead of a width. You can also set a border size in pixels (the border color will always be black) and a background color of the entire header/footer. Once you change the height to a value greater than zero and save you will be able to see the header/footer outlined in a red dotted border at the top or bottom of your form.
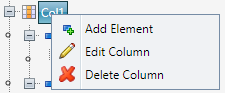
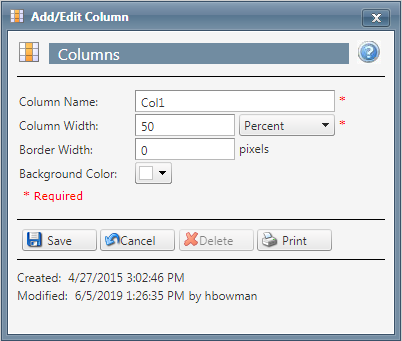
To add a column you can click on the Add Column button or right click the ‘Form’ node and select ‘Add Column’. To edit a column you can double click the column node or right click the column node and select ‘Edit Column’. This will open the Add/Edit Column window.

-
The column name will be defaulted to a generic name, however you can modify to be more specific.
-
Set the width of the column in percent or pixels. If the width is 100% the column will always take up the entire form horizontally, with no scroll bars regardless of the elements inside the column. If it’s questionable whether the elements will fit into the column based on you should set the width to be pixels and make sure it encompasses all the elements in the column.
-
Set a border size in pixels (the border color will always be black)
-
Set a background color for the entire column.
-
-
Click the save button to save your changes, they will be reflected in the preview pane. Each column is surrounded by a red dotted border in the preview window (unless you have specified a border width, then it will be a solid black border). The red dotted border will not be rendered in the order screen, it’s just to give a visualization of where the columns are.
SIM - Adding Columns
Copyright 2019
Revised 6.19.2019
Related Articles
SIM - Adding/Editing Custom Fields
Module : SIM Elements Path: Campaigns > Advertising > SIM Custom Fields Topic : Adding/Editing Custom Fields Version(s) : Version 5.1 and up Editions : All Editions You can create form specific custom fields, to capture and display additional ...SIM - Adding/Editing/Moving Elements
Module : SIM Elements Path: Campaigns > Advertising > SIM Elements Topic : Adding/Editing/Moving Elements Version(s) : Version 5.1 and up Editions : All Editions To add an element you can click on the Add Element button or right click the ‘Form’ ...Adding Images Within Notifications
Module: Notification Path: Processing > Notifications > Notification Setup Topic: Adding Images to Notifications Version(s): All Editions: All Images are a great way to make your notifications grab more visual attention. Please follow the following ...How to Set Default Columns for the Datawarehouse Export and the Flattened Export
The Datawarehouse Export and the Flattened Export are both very valuable reports in OrderLogix because they allow you to retrieve data in many different combinations, some of which may not be available from other default reports. These reports allow ...Editing a Source that is in use on calls/orders
When editing a source in OrderLogix (Navigate to COMPANY DATA>ADVERTISING>SOURCE and click the edit pencil icon next to the source that needs to be changed) that has already been used on a call and or order, you will get a dialog box that will ...