Product Groups
 Module : Product Data
 Path:
Topic : Adding & Editing Product Groups
Version(s) : Version 5.1 and up
Editions : All Editions
What Are Product Groups
Product Groups are a way to organize base items, and therefore product offers, for reporting purposes. Product Groups is also a way to narrow down payment processing if needed.
Making The Connection
Where Will I See This Within OLX?
Product Groups are used mostly in reports and payment processing.
What Reports Can Be Pulled?
- Most reports utilize Product Groups within filters and/or layout
- User Guide | Reports Knowledge Base (orderlogix.com)
What Imports/Exports Relate to xxxx
Trouble Shooting
items are not getting picked up for payment processing
- confirm the default payment proc account on the product group matches the associated payment proc account on the payment profile on the order. If it does not match, you will need to utilize the override constraint during batch payment processing.
Setup
Tool Bar
Utilizing the buttons on the tool bar  you can:
Go back to the previous screen 
Add new 
Print 
Minimize module 
Filter
You can use the filter options to narrow down the displayed selections.
- Client
- Default CC Pay Proc Acct
- Default ECheck Pay Proc Acct
- Product Group
Add additional filters by click the Add button 
Apply the filtered selections by clicking Apply Filter 
Remove the filtered selections by clicking Remove Filter 
To show inactive accounts in the displayed records check Show Inactive 
You can set the number of records to be displayed
Add New
- To copy an existing record, click on the copy button next to the record you want to copy.
 Custom Values will not be copied
- To edit an existing record, click on the edit pencil next to the record you wish to edit.
- To add a new record, click on the Add New button in the blue module bar.
- A new window will pop up.
Product Group Information
- Enter the name of the product group.
- If you are going to be exporting media information, you will need to create a product group that is the same exact name as one of your campaigns
- Choose the client the group is associated with from the Client drop down list.
- If applicable, choose a default credit card payment processing account. If no credit card payment processing accounts are associated with this product group, choose 'None'.
- If applicable, choose a default echeck payment processing account. If no echeck payment processing accounts are associated with this product group, choose 'None'.
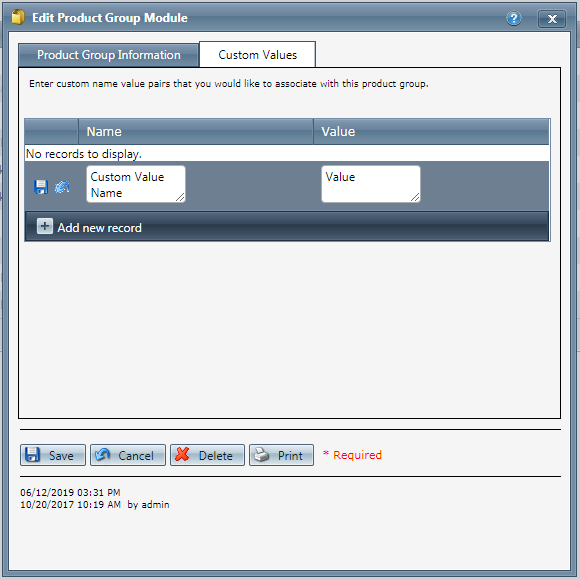
Custom Values
To add a new custom value, click on the “Add new record” button. This will insert a new row into the table and present two text boxes.

- Enter the custom name into the first field,
- Enter the value into the second field
- The value can be any string, it does not have to be numeric. Note: Field names must be unique for each individual feature.
Click the save icon to save the new custom value.
Click the arrow icon to cancel the custom value instead.
To edit an existing custom value, click the  pencil edit icon.
To delete an existing custom value, click the  red X icon.
* To save the changes click the Save button  .
.
* To cancel any of the current changes you have made click the Cancel button  .
.
This will close the window without saving any changes.
* To print the current window click the Print button  .
.
* To delete the selection click the Delete button  . You cannot delete when you are trying to add a new product group.
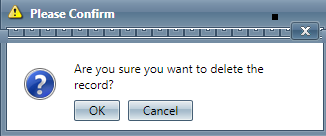
This will prompt you to make sure you want to delete this item.

- Clicking OK will delete the selected item and close the window.
Adding & Editing Product Groups
Copyright 2019
Revised 9.13.2024
Related Articles
Item List
Module: Product Data Topic: Item List Version(s): Version 5.1 and up Editions: All Editions What Are Product Items? Product Items are the base items that connect the Product Offers and Inventory Items to allow an item to be sold for a set price and ...Product Offers
Module: Product Data Topic: Product Offers Version(s): Version 5.1 and up Editions: All Editions What Are Product Offers Product offers allow you to set up individual scenarios for your products and campaigns. You can customize price, shipping, ...Product Guarantees
Module: Product Data Path: Products > Product Data > Product Guarantees Topic: Product Guarantees Version(s): 5.1 & up Editions: All Editions What Are Product Guarantees Product Guarantees (Terms and Conditions) can be configured to print on the ...Product Lookup
Module: Customer Service Path: Customer Service > Customer Service > Product Lookup Topic: Product Lookup Version(s): Version 3.5 and up Editions: All Editions What Is Product Lookup Use Product Lookup to find a customer based on Product information. ...Manage Scripts: Product Offers
Module: Manage Scripts PATH: Campaigns > Advertising > Maintain Scripts Topic: Product Offers Version(s): Version 5.1 and up Editions: All Editions What Are Scripts Scripts are the rules setup for order entry, whether the order is entered into the ...